Best Insect Glaive build in Monster Hunter Wilds
Take down monsters with a graceful dance of death by following our guide to the Insect Glaive.
The Insect Glaive in Monster Hunter Wilds is one of the more dynamic weapons available in the 14-strong arsenal, allowing players to launch themselves into the air and slice at monsters as well as hone in on body parts while planted on solid ground.
What makes this prickly polearm unique is the addition of a Kinsect, a bug companion that you can launch at body parts to collect and store extracts, which will protect your hunter and augment their combat abilities.
With multiple mechanics at play, it’s tricky to get the hang of the Insect Glaive’s complex, momentum-based gameplay. But once it all clicks into place you’ll be an unstoppable force of pure grace in Monster Hunter Wilds, swatting at beasts and reaching body parts that other players could only dream of.
In this guide, we’ll explain how the Insect Glaive and its Kinsect work in Monster Hunter Wilds, provide an overview of the best practices in combat, and suggest a weapon and equipment build to help you make the most of the weapon.
On this page:
If you'd like more monster slaying assistance, visit our Monster Hunter Wilds walkthrough where all of our guides are listed.
Best Insect Glaive build in Monster Hunter Wilds
We can’t claim to know the most damage-efficient Insect Glaive build this early in the life cycle of Monster Hunter Wilds, but here’s what we’ve been using to great effect up to Hunter Rank 80 in the postgame.
This build focuses on the ability to mount and wound monsters persistently, while building up Paralysis stacks to stun the beast and control the tempo of a fight. Our equipment recommendations also allow for a wide range of decoration slots, with underlying abilities honing in on partbreaking and wound creation to allow for easier extract gathering.
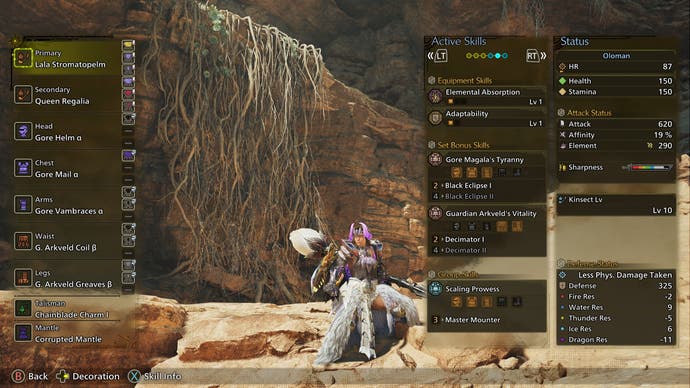
Best Insect Glaive recommendation
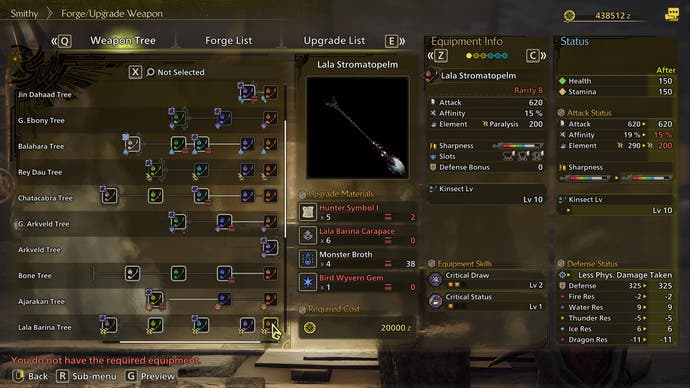
Our favourite Insect Glaive in Monster Hunter Wilds is the Lala Stromatopelm, which sits at the end of the Lala Barina tree. What it lacks in raw damage it makes up for with its elemental ability - you can regularly expect to paralyse a monster with continued attacks. The Stromatopelm also features a high Kinsect Level which allows you to ratchet up the debuffs with a Paralysing Kinsect, and the crit-focused Weapon Skills don’t hurt either.
Crafting resources:
- Hunter Symbol I x 5
- Lala Barina Carapace x 6
- Monster Broth x 4
- Bird Wyvern Gem x 1
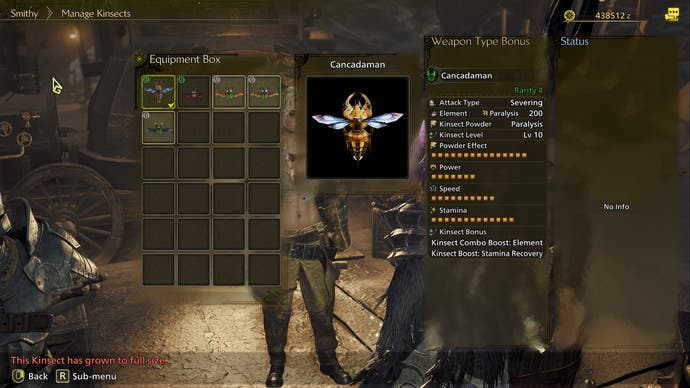
Best Insect Glaive Kinsect recommendation
Due to its paralysing powder and high Stamina stats, the Cancadaman Kinsect pairs well with the Lala Stromatopelm. You can raise it by purchasing a Culldrone, then raising it into a Rigiprayne, and then the Cancadaman.
Best Insect Glaive armour recommendation
Now that we’ve got a complementary weapon and kinsect setup, it’s time to think about armour. Our recommended build is centered around the Gore Magala Beta armour set, due to the Master Mounter group skill it provides, which heightens the speed at which you mount and wound mounted monsters.
This is important on two fronts - Master Mounter is often handy for giving you a breather in battle, but also allows you to reliably create three wounds upon a successful mount, which you can then pinpoint with a Focused Strike to replenish your extracts.
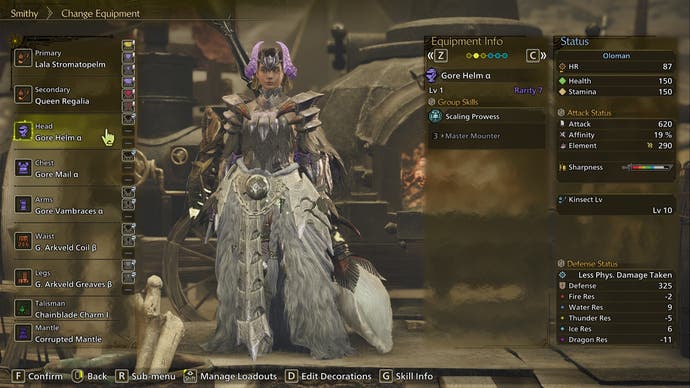
During Low Rank, you can use three pieces from the Hirabami, Balahara or Quematrice sets to activate the Master Mounter skill.
You can mix and match the order as you please, but we’re flanking three Gore pieces with two pieces from the Guardian Arkveld set to bolster defence. This also activates the Set Bonus Guardian Arkveld’s Vitality, which restores health upon destroying monster wounds.
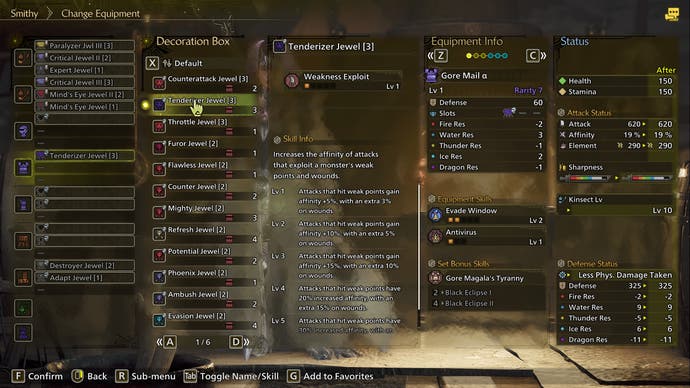
Decorations will depend on what you have dropped, but we’ve gravitated towards the following jewels, which you should look out for:
- Paralyser - Increases the rate of Paralysis buildup.
- Mind’s Eye - Your attacks are deflected less and deal more damage to hard targets.
- Destroyer - Makes it easier to break large monster parts, and increases damage dealt when destroying a wound with a Focus Strike.
- Tenderiser - Increases the affinity of attacks that exploit a monster’s weak points and wounds.
- Foray - Increases attack power and affinity against large monsters affected by poison or paralysis.
- Chain - Continuously landing hits gradually increases attack and elemental attack.
How Kinsects work in Monster Hunter Wilds
Before we get into how to use the Insect Glaive efficiently in Monster Hunter Wilds, it would be best to explain how the Kinsect works, and identify its place in the user interface.
With an Insect Glaive equipped, you should see a new interface appear underneath your health and sharpness bars. To the far left is a bug diagram with two partitions, and to the right are three diamonds, marked 1, 2 and 3. These are your extracts, and the key to success is in acquiring all of them:
- Red - Attack Buff - Head
- White - Speed Buff - Arms / Legs
- Orange - Defence Buff - Body / Tail
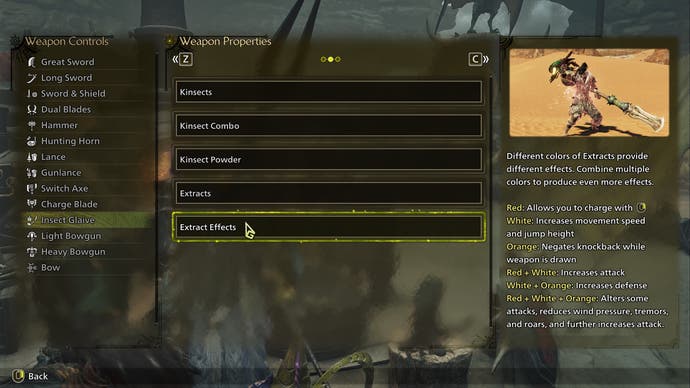
Specifically, the red extract will allow you to charge your Circle attack and deal more damage, while the white extract increases your speed and jump height. Finally, the orange extract ensures you don’t get knocked back or tripped during your aerial manoeuvres.
Collecting the red and white extracts will increase your attack, while the white and orange extracts increase defence. With all extracts collected, wind pressure, tremors and roars are mitigated, and you unlock a deadly new moveset, which we’ll touch on later as part of the best practice attack combination.
How to collect extracts in Monster Hunter Wilds
Before we tackle how to collect extracts in Monster Hunter Wilds, please note that the controls mentioned are for controllers. If you're playing on PC, you'll be able to use the in-game button mapping guide to learn how to perform the actions.
Hold down R2/RT to pull up the Kinsect targeting system, and if you hover the crosshair over a monster, you’ll see it change colour and number depending on where you’re pointing. For example, the head of a monster usually provides the red '1' attack buff. Alternatively, if the cursor turns green, this means you’ll receive a health buff upon collecting that extract, an extra consideration which can be handy in a bind.
With R2 held, you can then press Triangle to launch your Kinsect at a monster part. If it strikes the head, for example, the bug will turn red, and you can then press Circle to recall the Kinsect and collect the red extract.
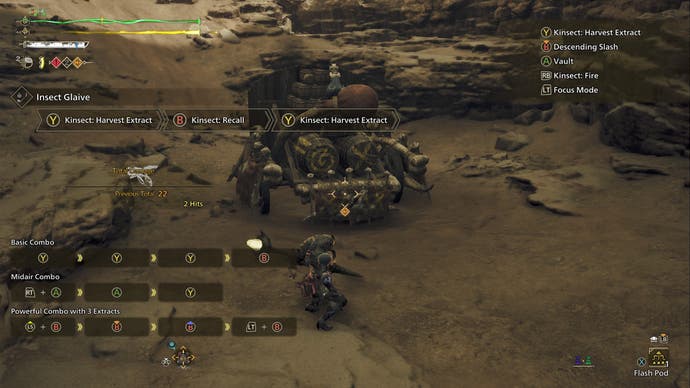
If you hold Triangle instead of just pressing it, you can charge up the Kinsect, and when released, it will travel through the monster’s body instead of bouncing off, potentially collecting multiple extracts on the way. This can be handy at the start of a battle, as you can attempt to capture all three extracts while facing the monster.
Alternatively, when you hold L2 to enter Focus Mode, any attack inputs you commit will be copied by your Kinsect. So if you’re missing the red extract, for example, you could navigate to the monster’s head, hold L2 and press Triangle or Circle in an attempt to force the Kinsect to collect that particular extract.
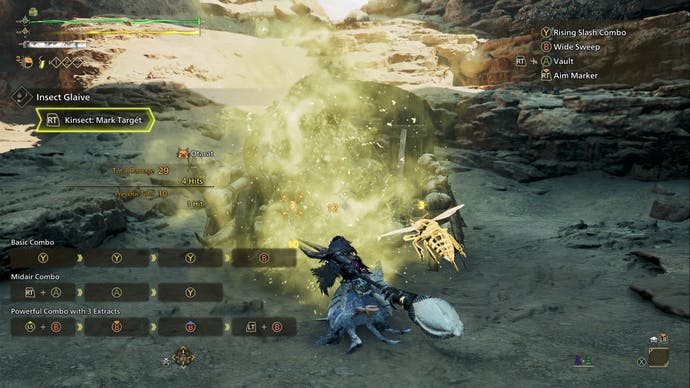
Elsewhere, pulling the right trigger will cause you to attack with a quick slash in front of you, and typically, the Kinsect will attempt to collect the extract if you hit a monster body part with this attack. You can also hold R2 and press R1 to shoot a dart out of the end of your glaive, and the Kinsect will fly towards it, which can be useful in collecting extracts from afar, or targeting while you’re in the air.
It’s worth mentioning that both of the aforementioned trigger pull attacks will leave behind kinsect powder, which can then be struck with another attack to create a status effect field. Depending on the type of Kinsect you have equipped, this could be Paralysis or Sleep.
Striking a number of powder fields close to a monster will lead the monster to accrue the designated effect, which can lead to an easy capture or deal extra damage over time. With that in mind, it’s worth consistently spreading powder in between your attacks to build towards these effects in a quest.
How to use the Insect Glaive in Monster Hunter Wilds
Before we teach you how to use the Insect Glaive in Monster Hunter Wilds, please note that we refer to the controls for controllers. (And in the following section.) If you're playing on PC, then you'll be able to find the Insect Glaive's specific button-mapping within the in-game guides.
With airtime to manage and nested attacks hidden behind extract collection, it can be quite daunting to use the Insect Glaive in Monster Hunter Wilds, at least compared to its hit-and-hope cousins in the weapon roster. But once you understand the basic combo progression options and begin stacking your Kinsect, the process of executing your liberating acrobatic inputs can become second nature.
The first thing you need to master is your aerial leap, which you can initiate by holding R2 and then pressing X. This will launch your hunter into the air, and while in the air, you can press X plus a movement input to jump again, launching them in another direction. This can be used as a purely evasive or positioning manoeuvre, but while in the air, you can also press Triangle to direct a slash towards a monster, or Circle to execute a descending slash, which will bring you to the ground while dealing damage.
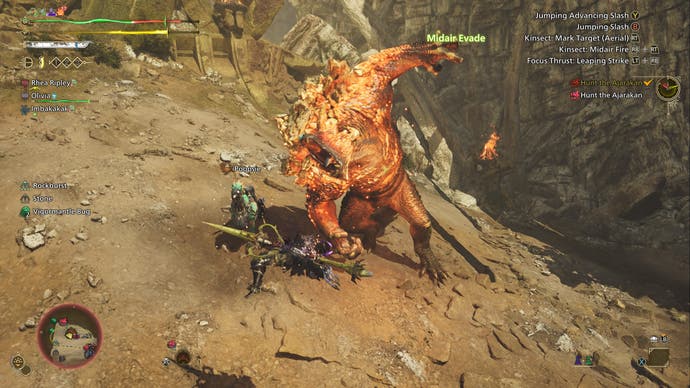
Because you need to collect your extracts to deal as much damage as possible, your time is going to be consistently split between ground and aerial combat. When you’re on the ground, you can get up close to a monster and spam the two attack buttons to create wounds, using the handy sidestep mechanic (L2 + X) to dodge swipes and elemental projectiles as you go. As detailed earlier in the guide, you’re going to want to use your L2 attacks on specific body parts and use your Kinsect to collect extracts from the monster. Bear in mind that you can also quickly collect all three extracts by pulling L2 and pressing R1 to execute a Focused Strike on an open wound when they appear.
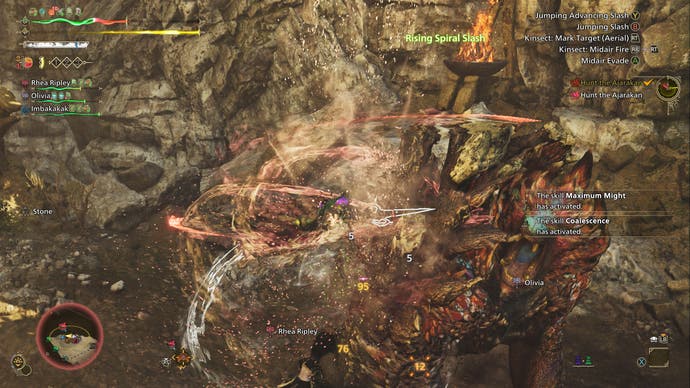
Combat approach will differ from person to person, but in my case, I like to begin a quest by pulling R2 + holding Triangle to charge and release my Kinsect at the monster, with the hopes of catching multiple extracts at once by firing it through the beast’s body. Then I’ll target the remaining body parts with close-quarters L2 attacks and Kinsect targeting to achieve my final extracts, spreading powder with R2 periodically.
With all three extracts acquired, Insect Glaive wielders unlock a special move called the Rising Spiral Slash, which can be activated by holding L2 and pressing Circle immediately after a charged Circle attack. This creates a tornado of kinsects around you, which deal increased damage to the monster in a localised zone. But when you activate Rising Spiral Slash, you will also expend all of your extracts, extinguish your buffs and return to square one.
It’s worth noting that you can actually pick up some extracts during a Rising Spiral Slash. It’s not uncommon to finish this attack with one or two extracts acquired, speeding up the process of getting back to a fully-charged kinsect. On rare occasions you can finish with three, allowing you to instantly repeat your inputs, but I wouldn’t count on it.
Best practice Insect Glaive combo in Monster Hunter Wilds
With this in mind, when I acquire three extracts, I like to leap into the air and press Triangle to spin-slash across the monster’s body, with an acute focus on the body part I need to break, where this is necessary. If the attack finishes near the monster’s body, the hunter will refresh their ability to jump or attack again (denoted by a little hop). This allows you to chain together multiple attacks in the air. From that point, you can press Triangle again to slash in a different direction, or press X to leap away and get a better angle first.
Once I’ve dealt a decent amount of damage, I’ll then hold Circle instead of pressing Triangle to activate my charged Descending Slash, arcing my attack towards a specific part of the monster where possible. Then as soon as I land on the ground, I’ll hit L2 and press Circle to activate Rising Spiral Slash, which will deal a big chunk of damage and drop my extracts back to zero (and potentially acquire some in the process).
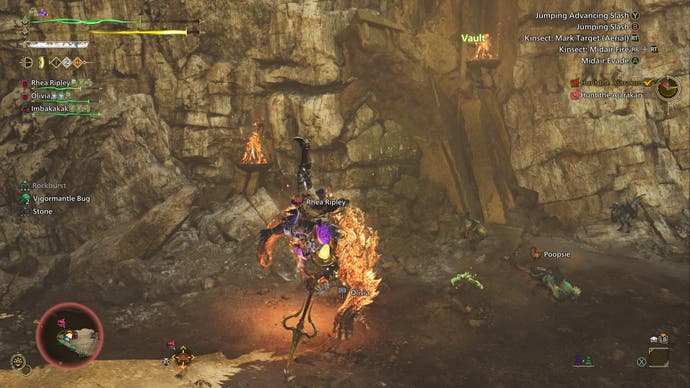
If you’re lucky, you may be able to catch a wound with a Focused Strike on the way down from a Rising Spiral Slash, which will provide you with three extracts immediately, allowing you to repeat the process quickly and juice your damage per second. Throughout this process, you should try your best to tap R2 or hit R2 + R1 in the air to spread your powder, which will help activate your Kinsect’s status effect sooner rather than later.
Of course, what we’ve presented here is the ideal scenario - and Monster Hunter Wilds is a highly unpredictable game, where the weather, habitat and monster moveset can get in the way. As you play, you’ll figure out your own ways to adapt to situations, and where to employ new moves to fill the gaps.
Best of luck using the Insect Glaive in Monster Hunter Wilds!


